


IKEA Play Kitchen Makeover – DIY Process
Over the past few months, I’ve had the unique opportunity to makeover not one but two IKEA play kitchens. Experience is always the best teacher and I used a few different methods on each kitchen. So here’s a roundup of how to makeover your own IKEA play kitchen and what methods and products I believe work best!

**This blog post may contains affiliate links.

Make a Plan
The best thing to do is sit down and plan out your design first. If you haven’t already checked it out, read this blog post for all the ideas I put together about what you can DIY and customize on the IKEA play kitchen. There’s also a fun list of play accessories like coffee makers, mixers, play food, etc at the end so check that out too!
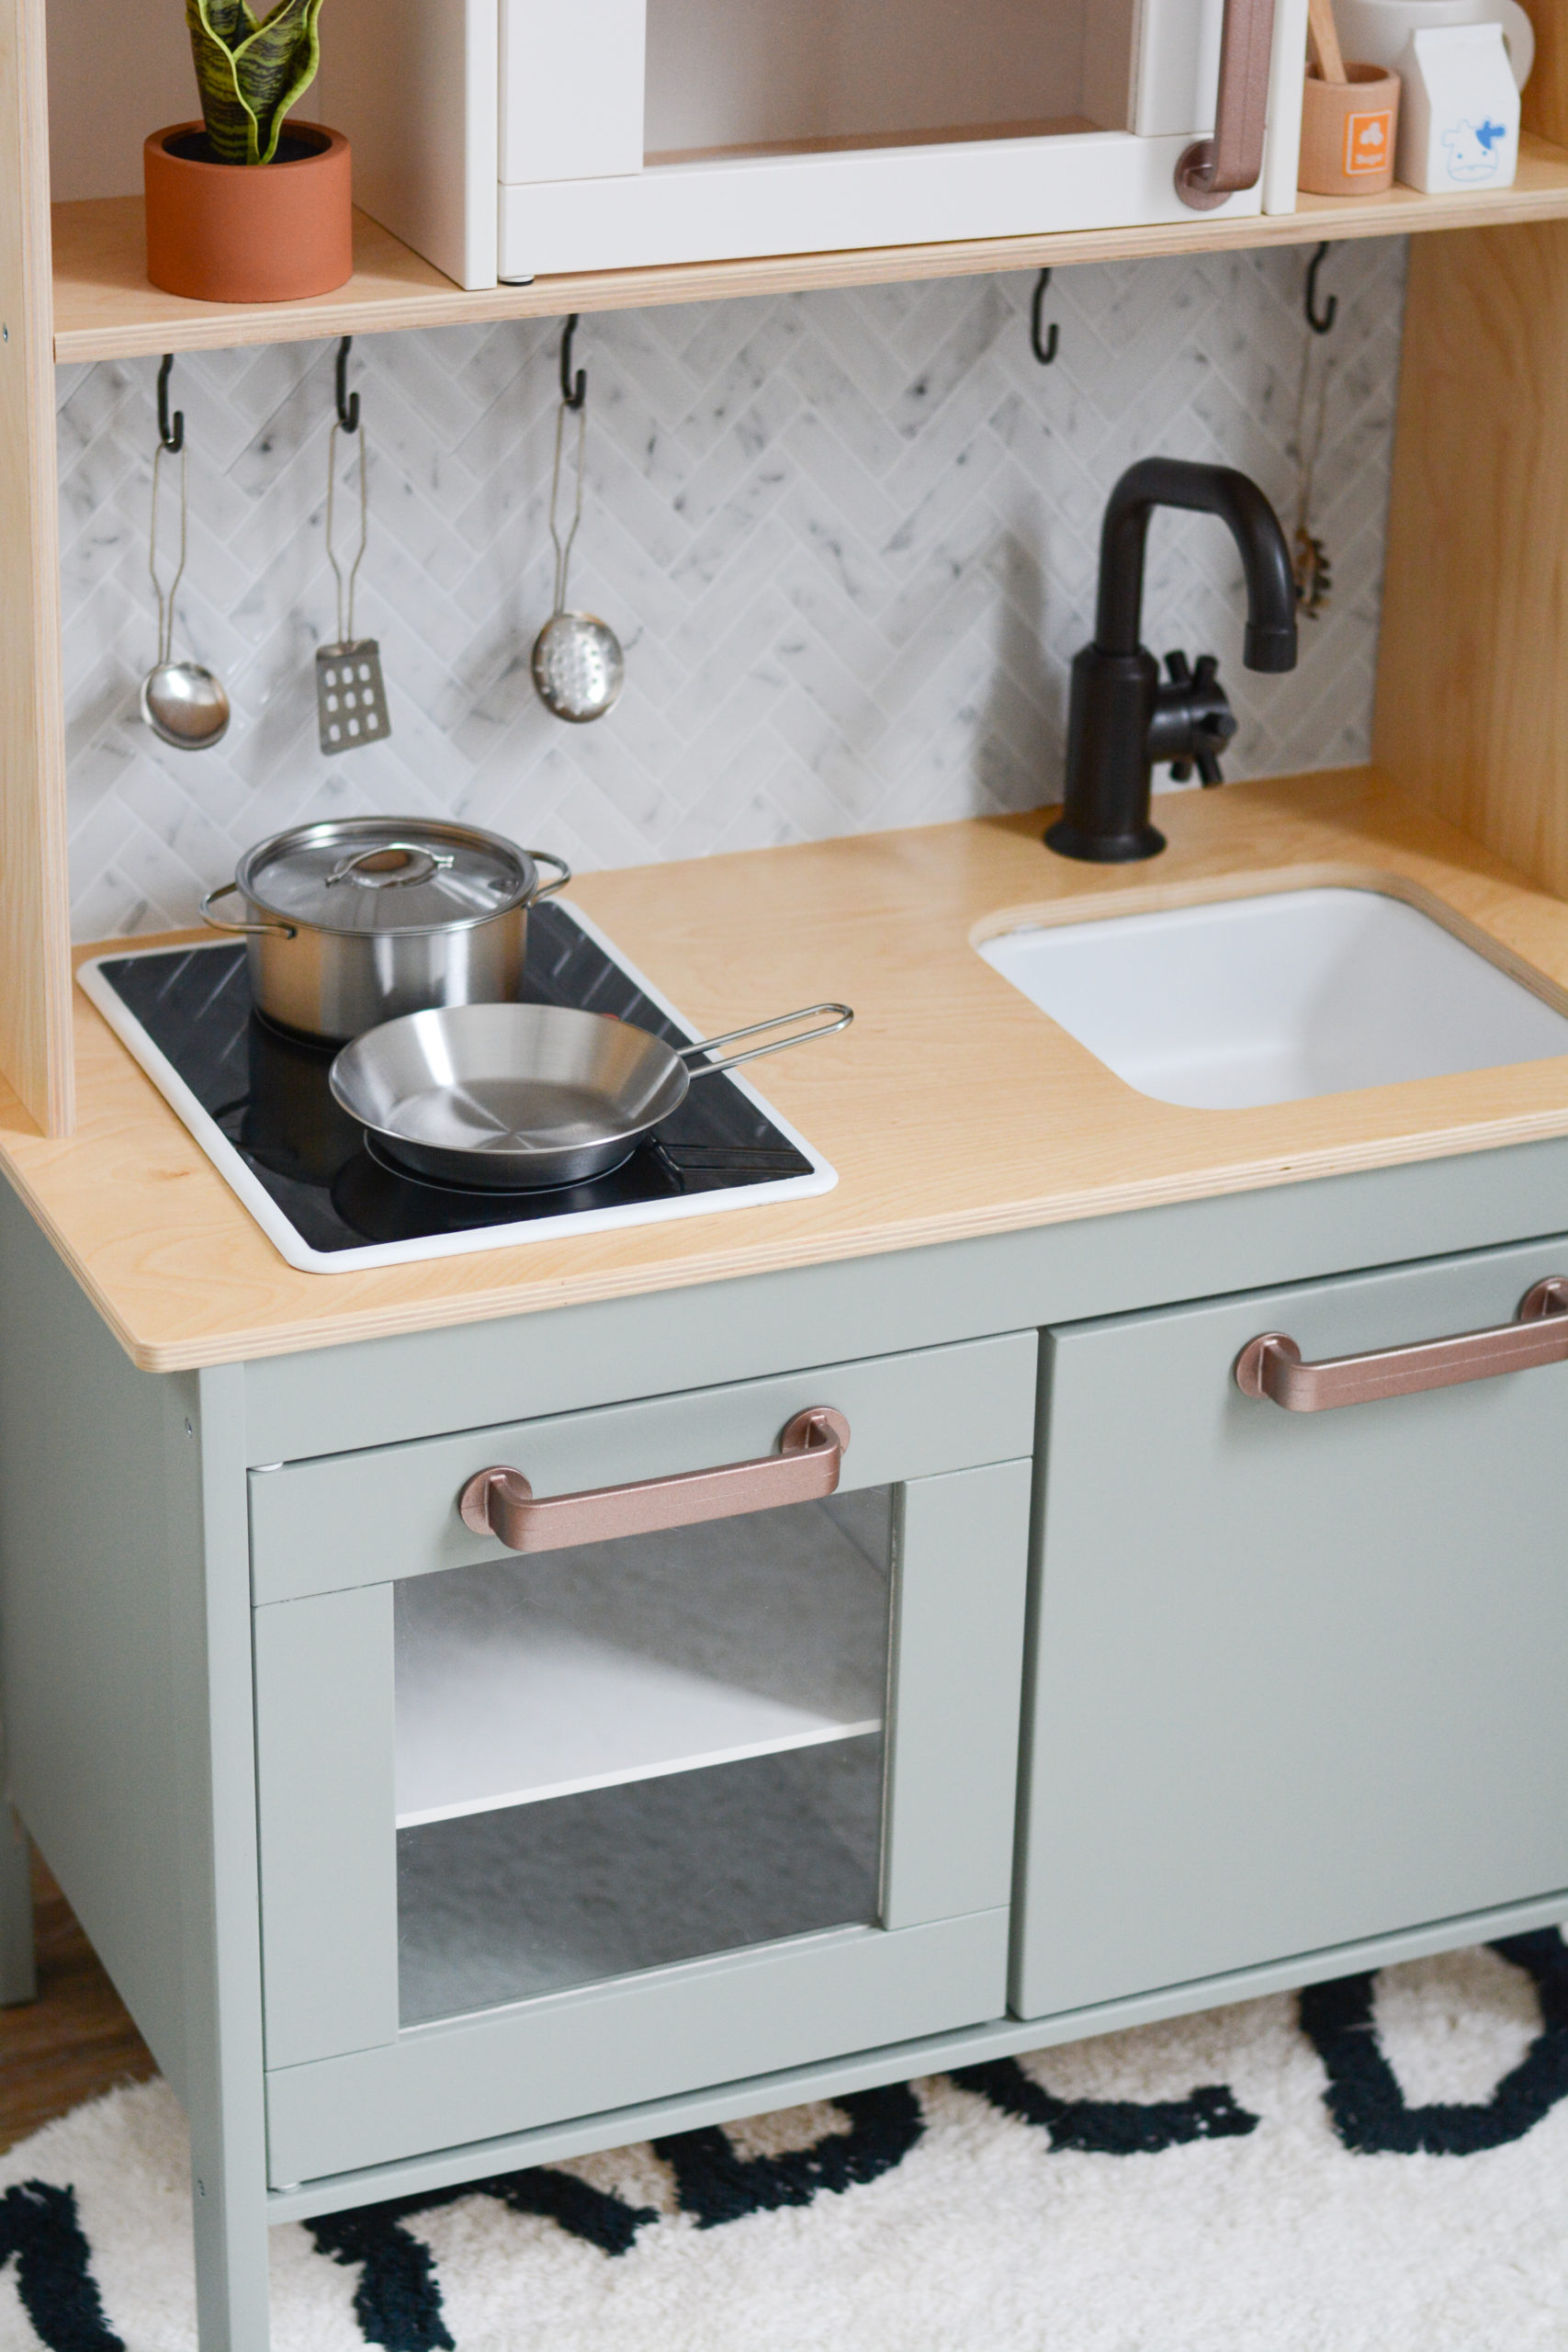
This kitchen makeover is for my sweet little one year old son and I wanted it to gently scream boy while flowing with the interior of our house and his playroom. I chose a beautiful blue-green-grey paint color, some more boyish hardware spray paint colors, and then softened it with the natural wood countertop and marble herringbone backsplash.
Lay Everything Out
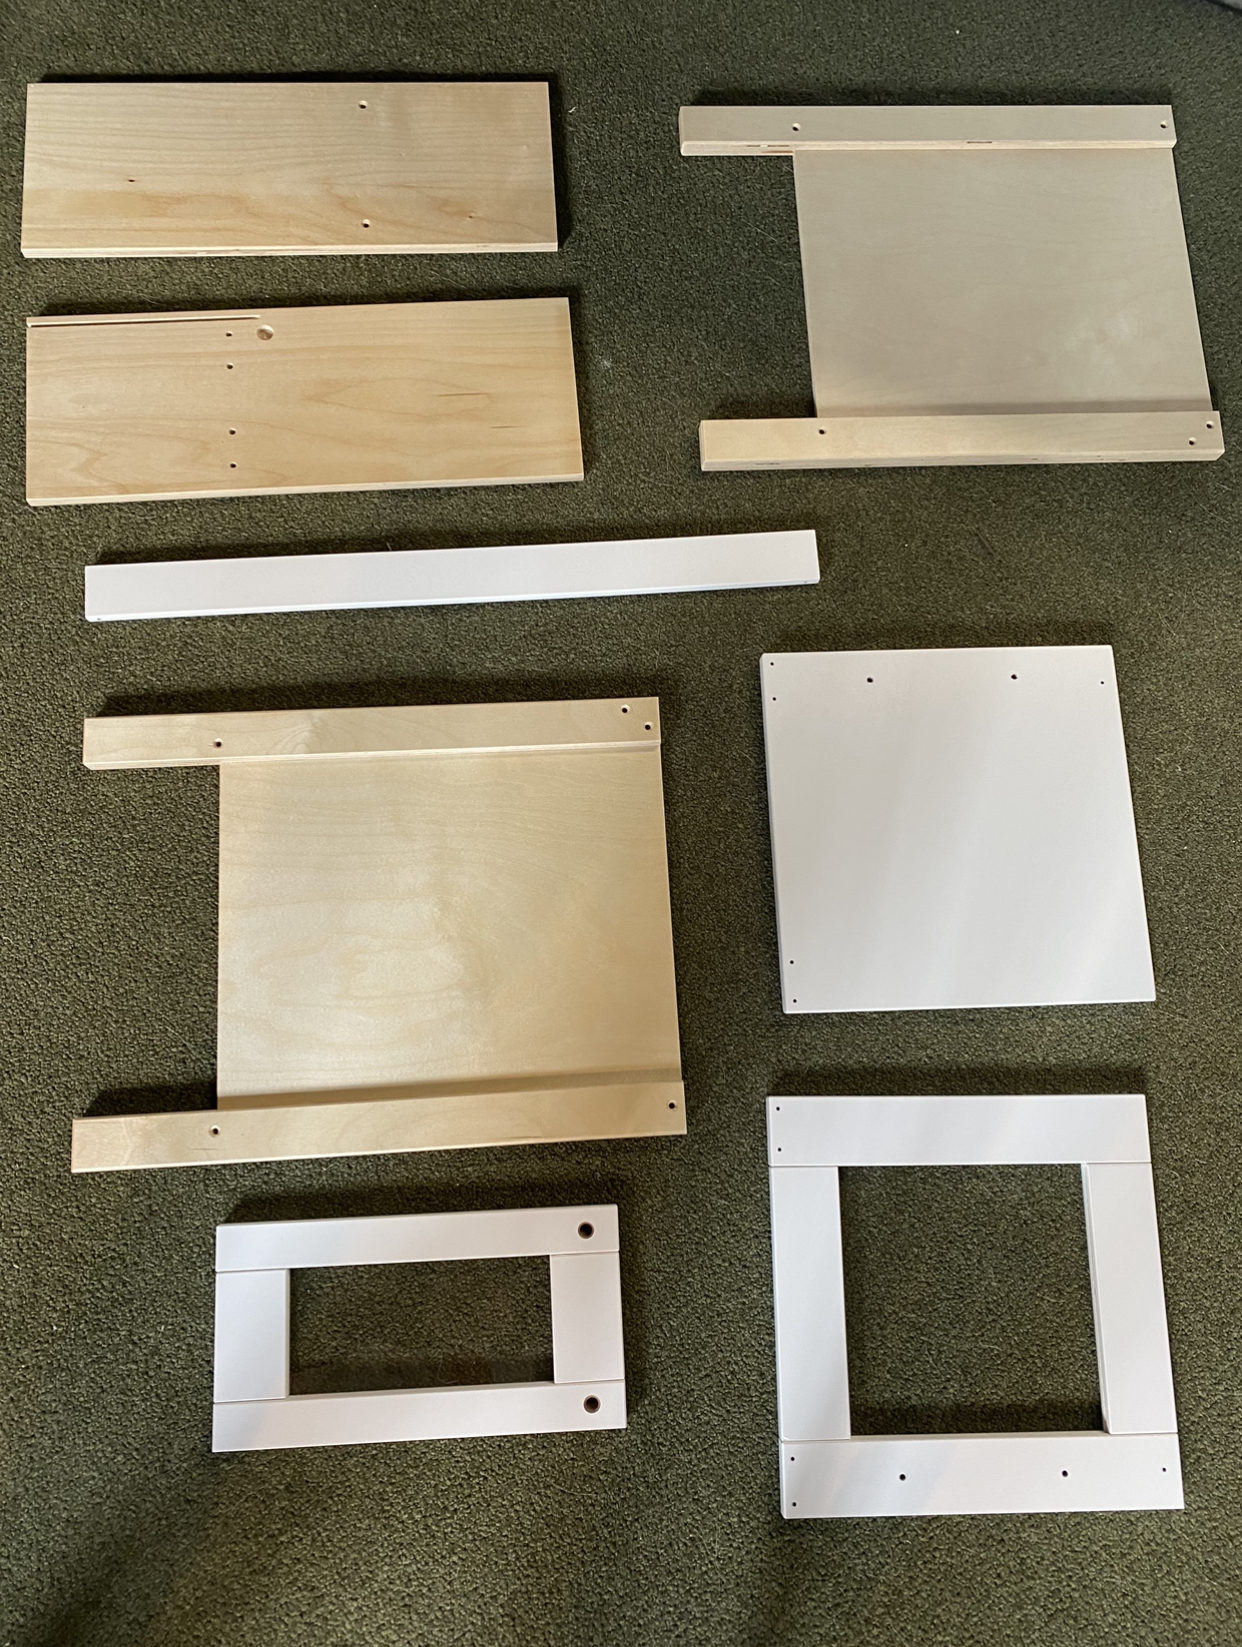
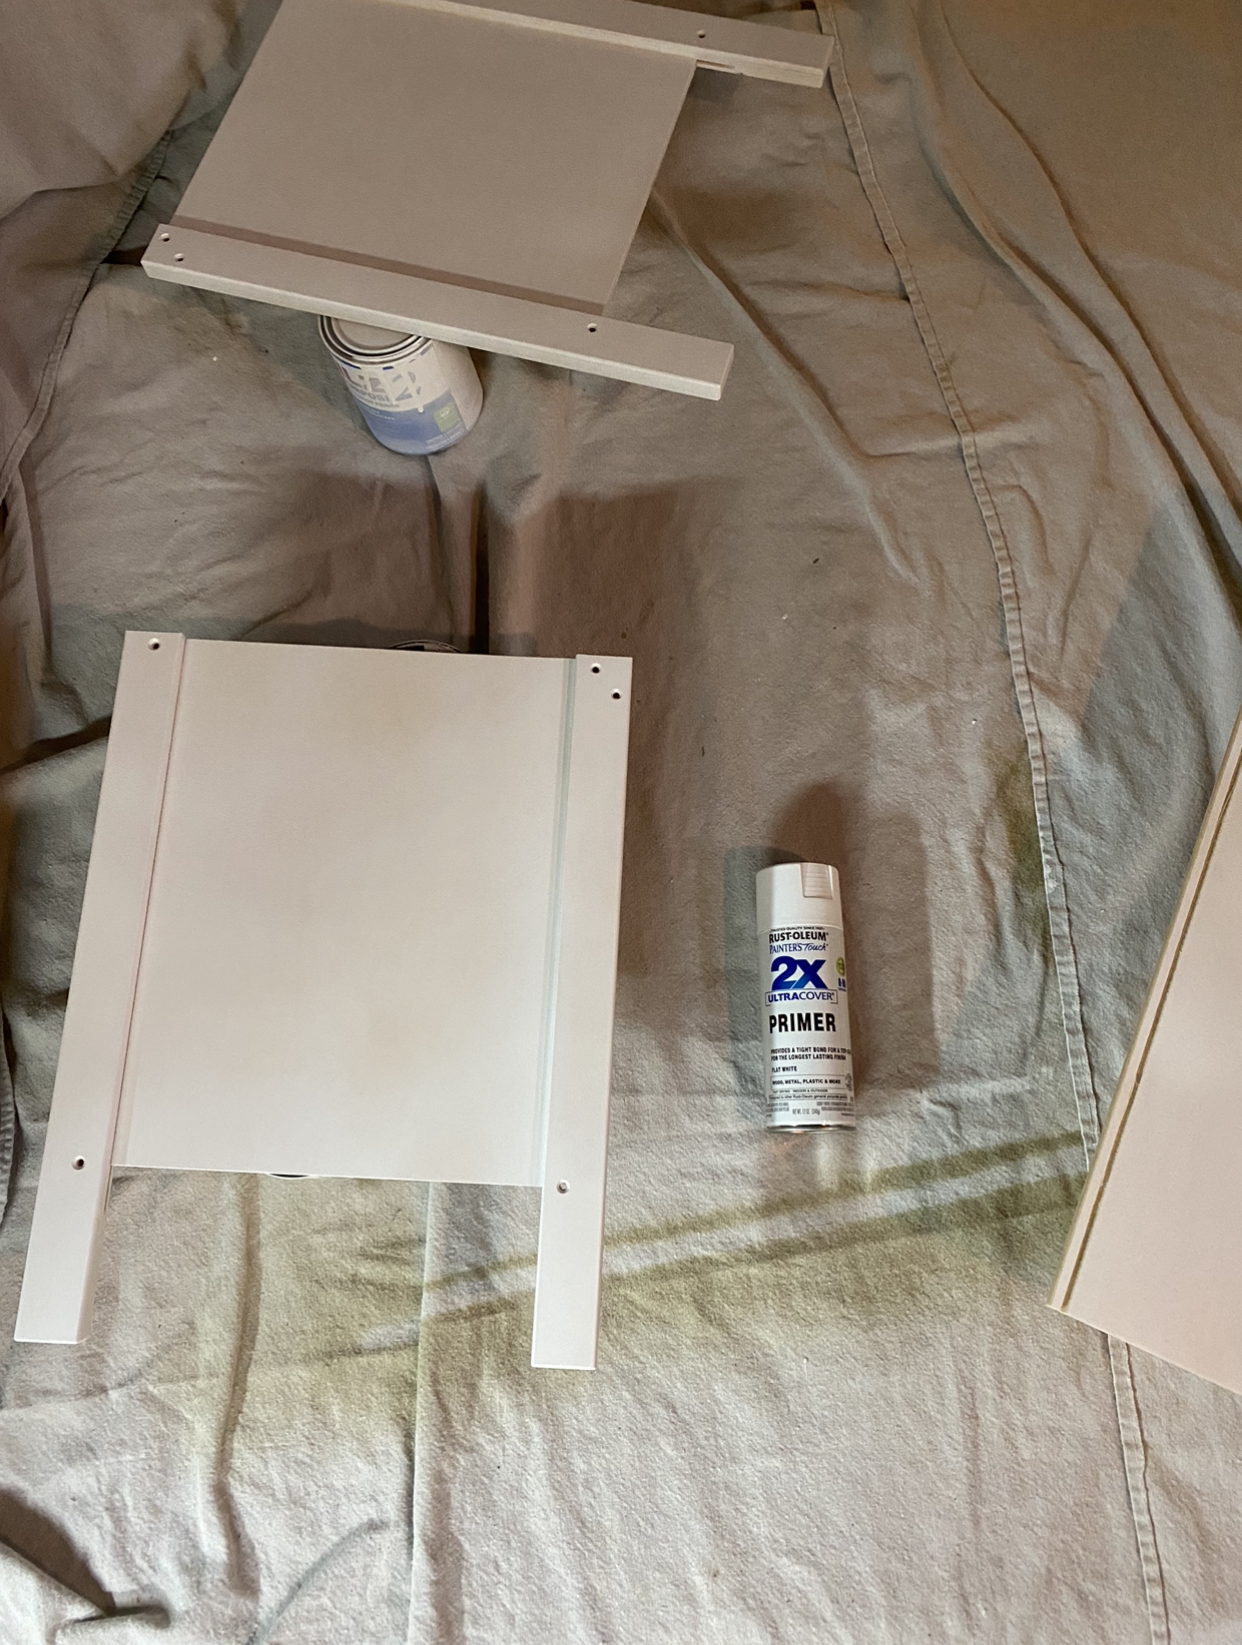
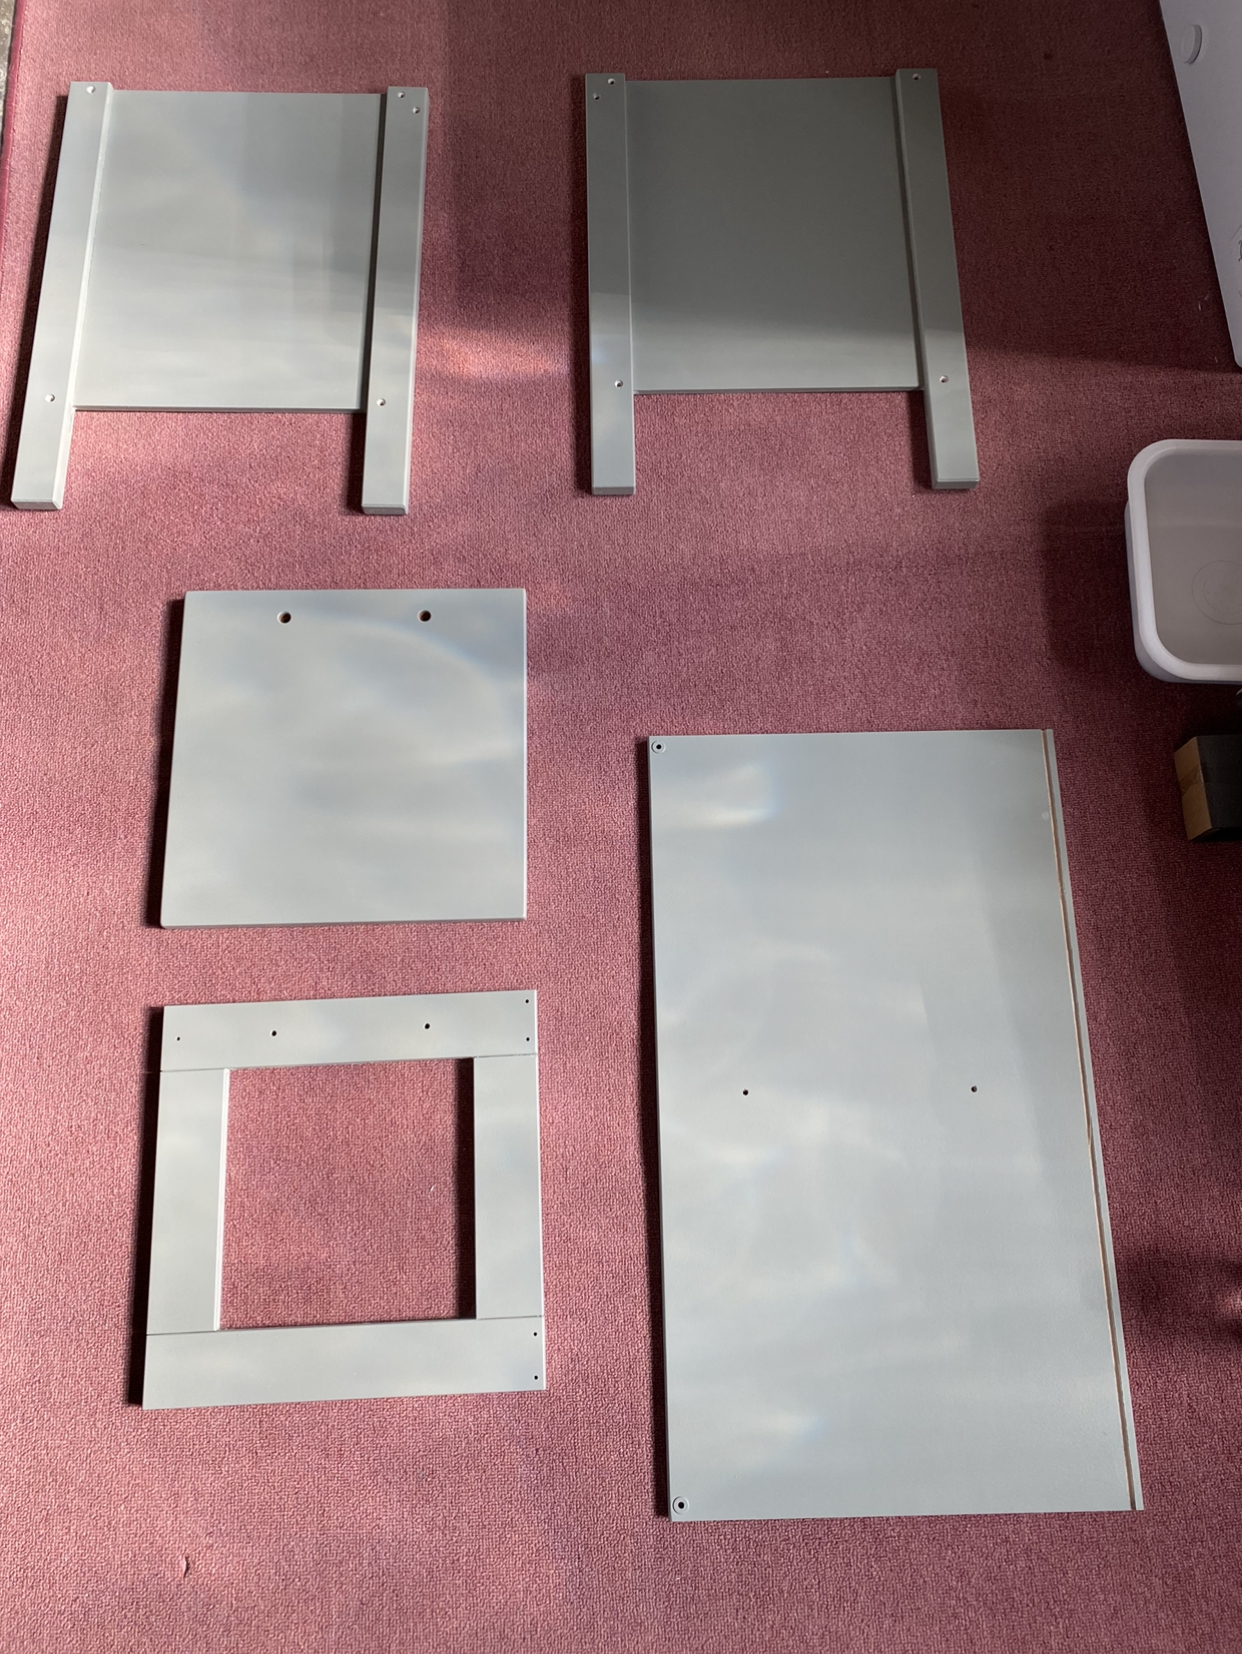
The instruction book that comes with the play kitchen is woefully lacking in regard to labeling the different parts of the kitchen. It’s not that hard to figure out though if you lay out all the pieces and compare them to the picture on the front of the manual. It took me about 20 minutes to figure out, and then I separated the top pieces from the bottom pieces and laid all the hardware and countertop aside.
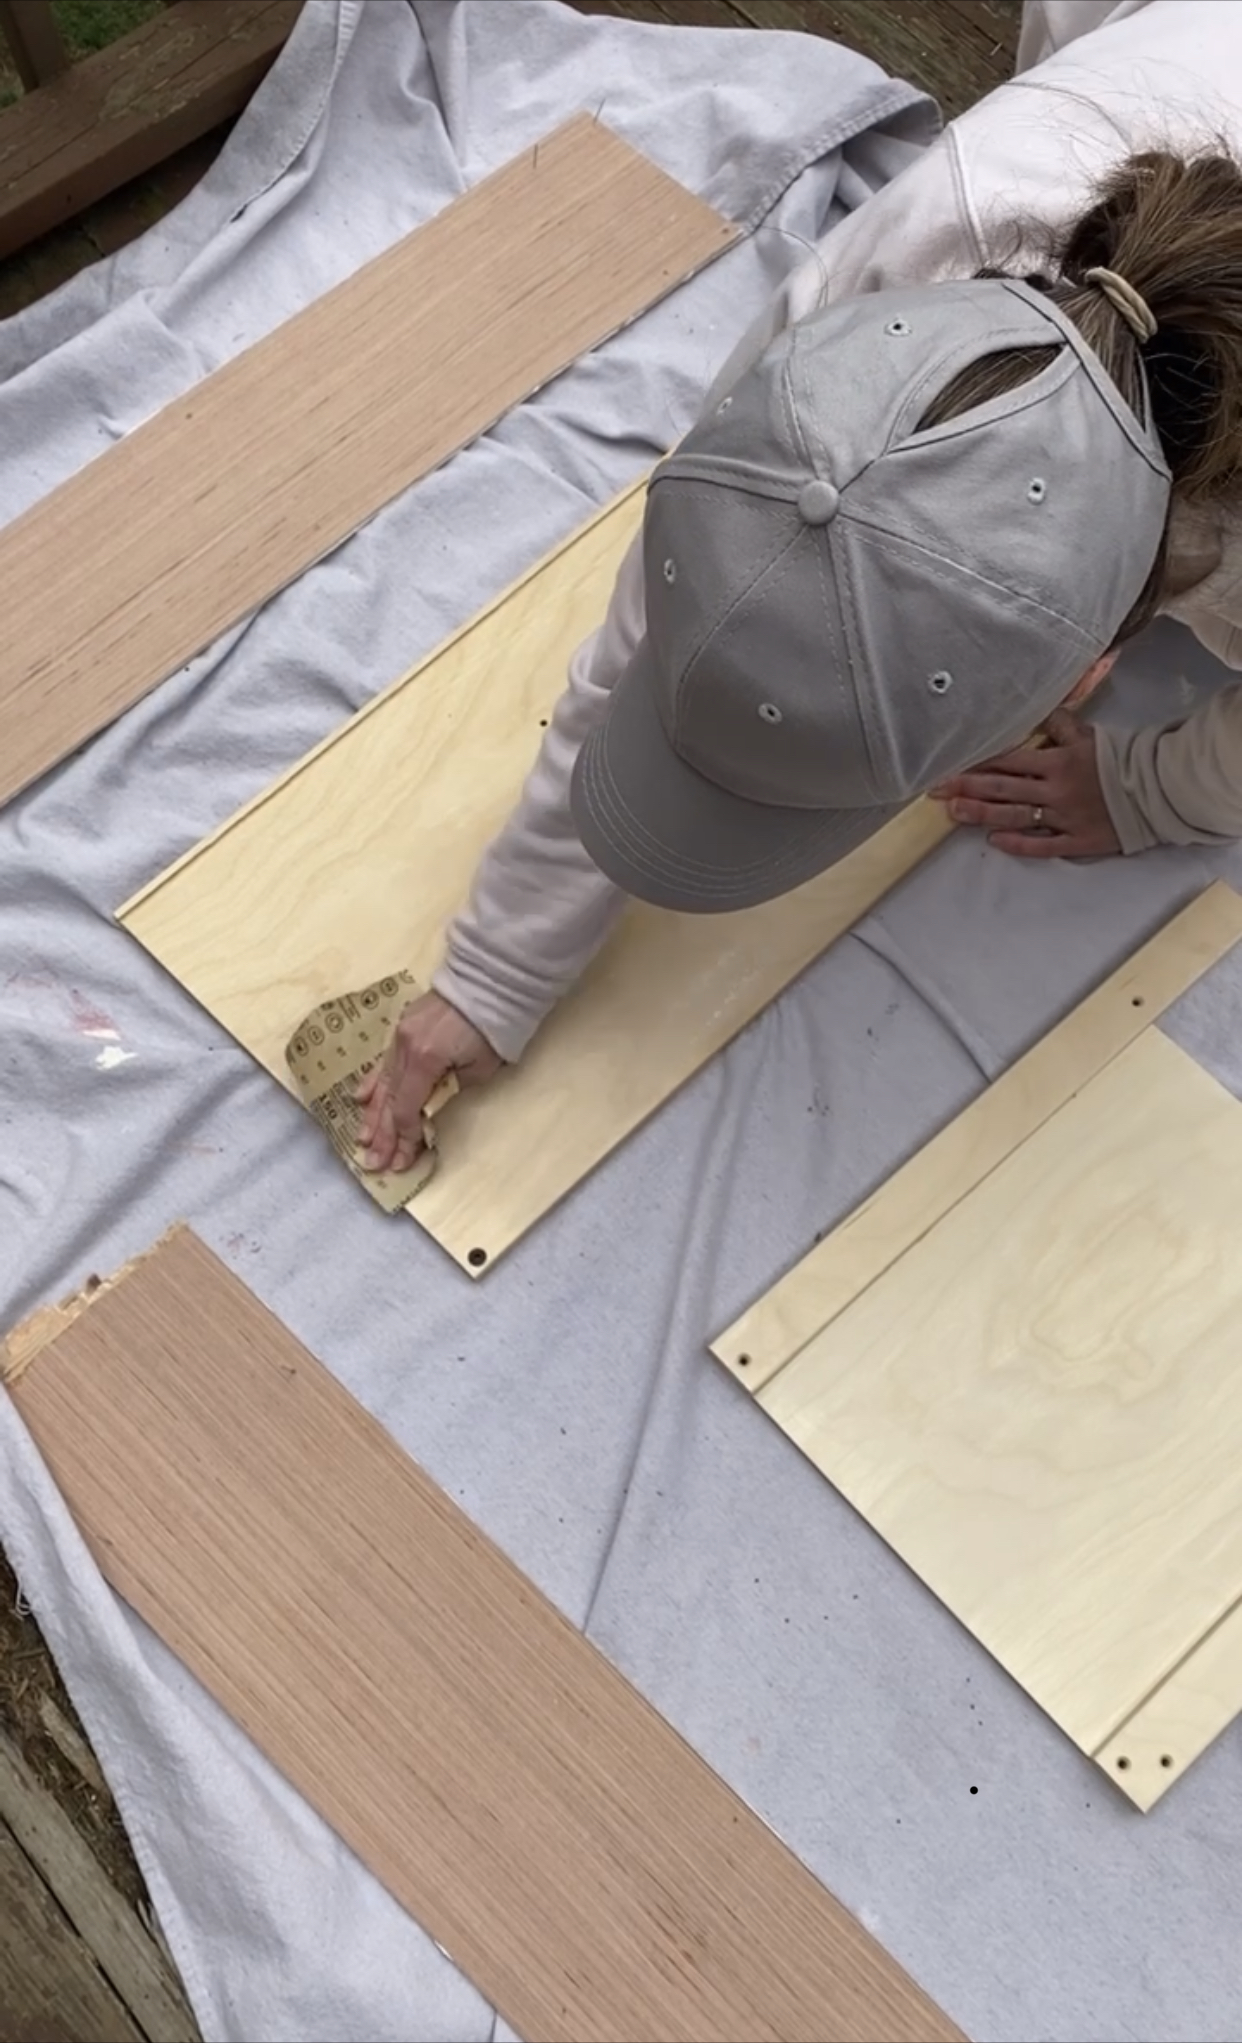
Preparation: Sanding & Priming
It’s no secret that toddlers aren’t the most gentle creatures, so I strongly recommend taking the time to lightly sand and prime all the cabinets (and countertop) you plan to paint. I made the mistake of trying to minimize paint steps because it was midwinter when I DIY-ed both kitchens and I don’t have a garage. The pieces that I primed have held up beautifully. The pieces that I thought I could get away with not priming were scratched within the first few minutes of my son playing with kitchen. Also, be sure to follow the instructions on the back of the can for the temperatures you can spray in, recoating, and drying times – these instructions MATTER for getting the best result and keeping this project a short, joy-filled one.
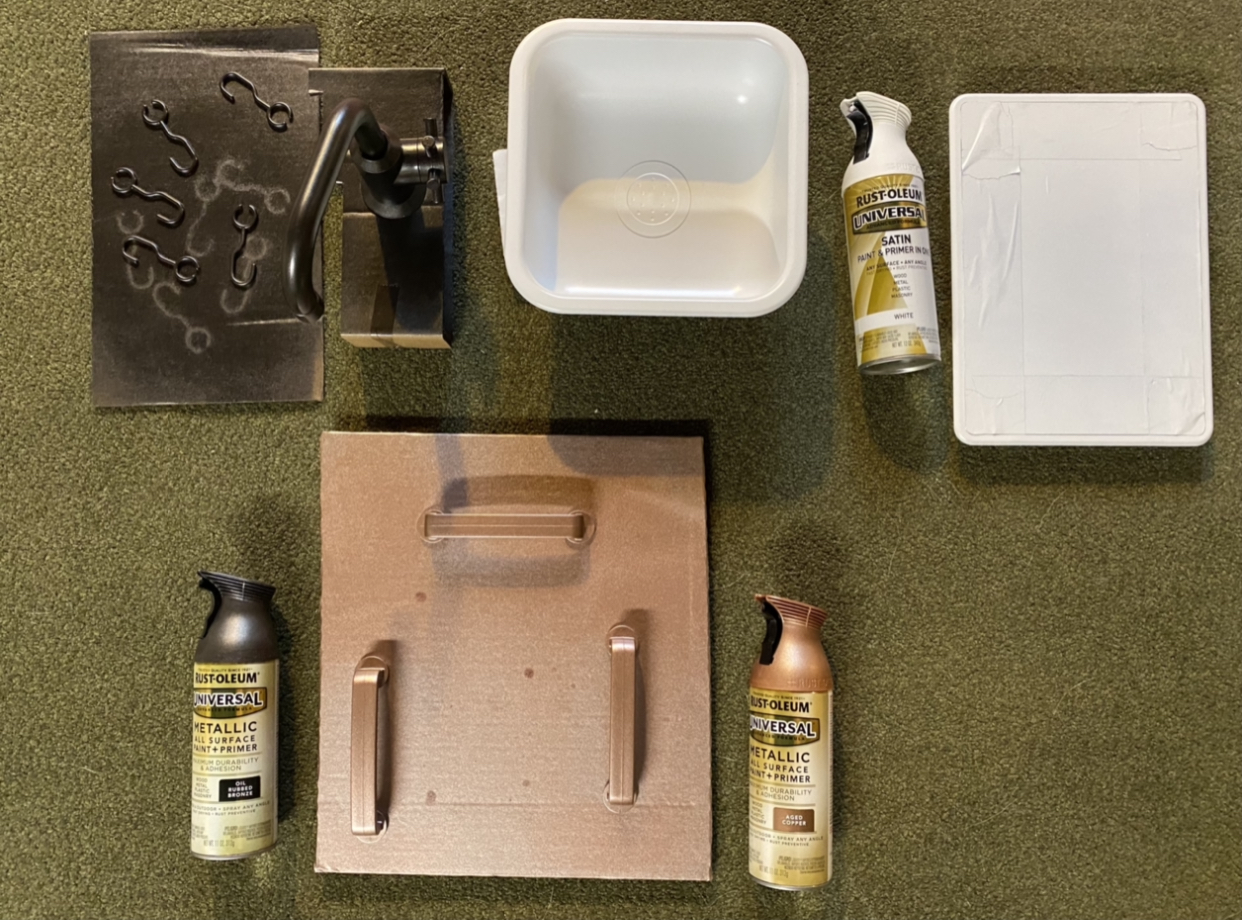
Spray Paint Hardware
Once you’ve primed your hardware and made sure that it has dried according to the drying times on the back of the can, get ready to spray paint the sink, faucet, drawer pulls, and the rod with hooks. To get the most even paint job, I recommend taking the cardboard that came with the kitchen and punching holes in it for the bottoms of the faucet and drawer pulls to sit upright.
I decided on this white for the sink, oil rubbed bronze for the faucet and rod with hooks, and aged copper for the drawer pulls.
Paint Your Cabinets
After using both spray paint and regular roller/brush paint, I would recommend spray paint for a smoother paint job. HOWEVER, if you’re like me and have your heart set on a specific paint color, I would recommend buying your paint color in a quart of Sherwin Williams Emerald Urethane paint. This paint is commonly used for trim and dries much harder than standard paint, i.e. it’ll stand up much better to your toddler banging pots and pans on it. I’ve used this paint on multiple projects and LOVEEEE it – it is relatively self-leveling and doesn’t require any type of top coat be used with it.
For this kitchen, I used the color Pigeon by Farrow and Ball and Sherwin Williams has the color in their system if you just ask when you go in to order your paint!
Countertop & Backsplash
For my son’s kitchen, I decided to leave the countertop the natural wood and I love it so much!!! It holds up to his active playing very well and was the perfect touch of warmer texture for this kitchen design. However, you may have picked out a contact marble paper or decided to paint your countertop. If you chose the contact paper, use a hair dryer around the edges to get a smooth tight finish. If you chose paint, don’t forget to sand and prime before painting!
This kitchen doesn’t come with a backsplash but it’s so easy to make one! You can either use foam core poster board or thin plywood, and you’ll need to cut it to 26 3/4″ long and 12 1/4″ tall. I ordered in peel and stick tiles for both kitchens I did and found that 6 tiles worked best for covering the entire backsplash with the least amount of piecing together hassle. For the best look, I applied the tiles to the poster board, flipped it over and used a utility knife to cut off the excess. I then used liquid super glue on the very outer side and top edges and it stuck immediately (so make sure you line it up correctly because as soon as it touches, it’s stuck forever). For the bottom edge against the countertop, since it was just a bit uneven and I wanted it to be secure too, I used regular trim caulk and a baby wipe for a nice clean caulk line. I ordered in this beautiful marble herringbone peel and stick tile from Amazon.
Top Coating
I would recommend top-coating your hardware, sink, faucet, and rod with a protective clear spray sealant. These are the pieces that take the most abuse and you’ll thank yourself down the road for taking an extra hour and adding a few top coats to protect the paint job!
Assembly
All your hard work is done! Pop on your favorite podcast or tv show after your little one goes to bed (there’s lots of small screws so plan for a time when your little one isn’t around) and just follow the directions. It took me about an hour and a half to assemble both of mine and I’m by no means a pro furniture builder.
I decided to under mount the sink on this kitchen for a fun more modern look. You’ll need to pre-drill the holes in the bottom of the countertop but be careful not go too far (my husband did on one of the holes and I’m totally forgiving trying not to hold a grudge). Drilling the holes into the sink did chip the sink paint job a little too and I had to touch that up. Overall, I would probably recommend NOT under mounting the sink – it looks cute but it was a hassle because the countertop is so thin!
Accessorize & Enjoy!
I ordered in an adorable little coffee maker from Amazon and found the cute little snake plant in the dollar spot at Target. We bought the pots and pans from IKEA when we picked up the kitchen and the rug is from Amazon! It’s a great pottery barn dupe and costs half the price. I’ve washed it from accidents, vacuumed it weekly for over a year, and highly recommend!
You may also like
Some sort of short description for the category will go right here.
Some sort of short description for the category will go right here.
Some sort of short description for the category will go right here.
Some sort of short description for the category will go right here.
Some sort of short description for the category will go right here.
What you’ll find around here


Shop My Favorites
I’m baby semiotics paleo VHS fixie fashion axe ramps tote bag church-key, bodega boys mixtape wolf af pug jawn stumptown. Locavore PBR&B ugh live-edge, small batch kitsch four dollar toast.
Angela's Picks


A downloadable paint guide to help you choose just the right shade for your next project.
So cute and so creative! Now I want my “real” kitchen to look like this lol Great job my friend!